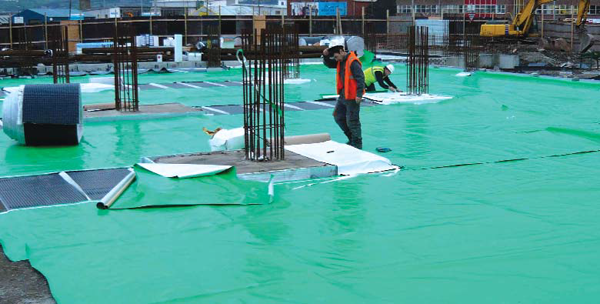
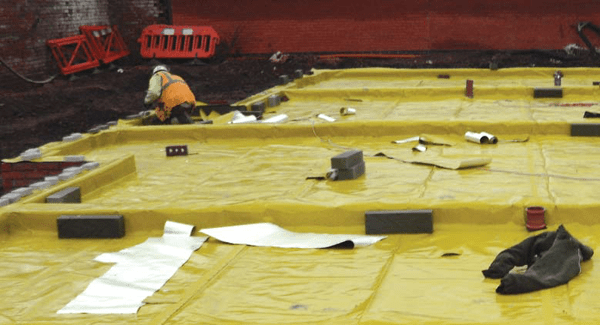
Protech GM+ is a high performance proprietary reinforced gas barrier, that has been specifically designed to conform with the latest guidance documents.
Due to its unique composition the membrane is extremely robust and flexible and therefore easy to install on site. The membrane also provides protection from damp and, therefore, there is no need to install a separate DPM.

Protech GM Super
Specification
Ciria 665, BS8485 & Local Authority Ground Gas Handbook recommend that gas membranes are specified on the basis of the ‘need to survive’ construction, i.e. use one that is puncture and tear resistant.
Thickness should not be the main determinant of the suitability of a membrane for a particular site, although it can indirectly influence some key performance parameters.
In practice, because of the nature of construction sites, the durability, survivability and robustness of membranes are equally important than purely permeability to gas.
Protech GM+ incorporates a reinforced grid to ensure that maximum protection is achieved when installed to manufacturers’ instructions.
The need for high quality workmanship during installation should not be under-estimated. The health and safety of the occupants of the building is dependant on its satisfactory performance. If installed incorrectly or damaged during the construction process, the membrane is rendered ineffective and will fail to provide adequate protection against the ingress of ground gas or vapours.

| CIRIA 665 CHARACTERISTIC SITUATION 2 | CIRIA 665 CHARACTERISTIC SITUATION 3-6 | BS8485 AMBER 1 | BS8485 AMBER 2 & RED | BRE 211 RADON | NHBC AMBER 1 | NHBC AMBER 2 |
| METHANE | ✓ | X | ✓ | N/A | ✓ | X |
| CARBON DIOXIDE | ✓ | ✓ | ✓ | N/A | ✓ | ✓ |
| RADON | N/A | N/A | N/A | ✓ | N/A | N/A |
Regulations Compatibility Table
| TYPICAL PROPERTIES | |
| ROLL LENGTH | 50m |
| WIDTH | 2m |
| WEIGHT | 0.29kg/m2 |
| THICKNESS | 0.4mm |
| COLOUR | YELLOW |
| CO2 PERMEABILITY BRE GAS CHROMATOGRAPH | 0.06 g/m2 31 ml/m2/day |
Required Accessories
- Protech Starter Band
- Protech GM Jointing Tape
- Protech GM Tophats
- Protech SAGM (Self Adhesive Gas Membrane)
- Protech GM Flashing Strip
- Protech GM+ Corner Units
- Protech GM Primer
- Protech GM 3mm Protection Board
Venting
On sites where venting is required, our Provoid Venting System should be used. We can provide design advice for both passive and active venting systems to suit individual site requirements.
Taped Joint Installation Procedure
Step 1 Roll out Protech GM+ gas membrane and apply Protech GM doublesided sealing tape 50mm from edge of Protech GM+ gas membrane and run a stiff brush down the Protech GM double-sided sealing tape to ensure it is well adhered to Protech GM+ gas membrane.
Step 2 Roll out next sheet of Protech GM+ gas membrane maintaining a minimum 150mm overlap with bottom sheet.
Step 3 Starting at one end of the run of membrane, pull back the corner of the top sheet of the Protech GM+ gas membrane to expose the Protech GM double-sided sealing tape. Pick the release paper form the top of the Protech GM double-sided sealing tape and pull the release paper away from the Protech GM double-sided tape whilst walking down the length of the Protech GM+ gas membrane to be jointed.
Step 4 To complete the joint, apply firm pressure with a stiff brush to the joint as shown below to ensure that any trapped air escapes and the two sheets of Protech GM+ are firmly adhered and well sealed.

Patch Detail
- Clean membrane with a damp cloth and wipe dry.
- Cut strip of Protech GM Flashing strip min 150mm x 150mm, remove release paper and place over the hole or tear.
- On larger holes, use several pieces of 150mm x 150mm Protech Flashing Strip, ensuring that strips are overlapped a minimum of 25mm with adjoining strip.
Stanchion Detail
- Trim Protech GM+ Gas Membrane around stanchion.
- Apply two coats of Protech Bitumen Primer to area of stanchion to be covered by Protech Flashing Strip.
- Cut lengths of Flashing Strips and fold in half and apply to Protech GM+ Gas Membrane and stanchion.
- Repeat the process around the entire stanchion until a gas tight seal is achieved.
Tape Joint Detail
- Lay roll of Protech GM Super Gas Membrane on prepared sub base or Provoid Venting Mat ensuring that all creases are removed and sheet is laid flat.
- Roll Protech GM double-sided jointing tape 50mm in form edge of Protech GM Super Gas Membrane.
- Roll out next sheet of Protech GM Super Gas Membrane ensuring a minimum 150mm overlap with adjoining sheet.
- Remove the release paper from the Protech GM Jointing Tape and apply pressure to the top sheet of Protech GM Super Gas Membrane (this can be done with a stiff broom).
- Ensure that the two sheets of Protech GM Super Gas Membrane are securely sealed.
Tophat detail
- Trim Protech GM+ Gas Membrane around pipe penetration.
- Fix Protech GM Jointing Tape to underside of tophat flange 20mm for edge, ensuring that there are no gaps between the strips of tape at each corner.
- Remove the release paper from the Protech GM Jointing Tape and slide the Protech GM Tophat over the pipe and push down onto Protech GM+ Gas Membrane.
- Ensure that the Protech GM Tophat is adhered to the Protech GM+ Gas Membrane.
- Cut a strip of Protech GM 150mm Flashing Strip and stick to top of pipe penetration and Protech GM Tophat ensuring a 75mm overlap onto Pipe and Protech GM Tophat.
Preformed Protech Tophats are available in all popular pipe sizes ranging from 55mm-225mm
External & Internal Corner Detail
- Cut, trim and dress Protech Starter Band over masonry and tape to Protech GM+/Super Gas membrane using Protech GM doublesided tape.
- Remove release paper for Protech GM double-sided sealing tape from rear of Pre-taped Protech GM+/Super External/Internal Corner Unit.
- Position Protech GM+/Super Corner Unit and press firmly into position ensuring that it is adhered to Protech Starter Band.
- Please note that an architectural cavity tray, in most instances, will need to be placed above the corner detail.
BS 8215, Design and Installation of DPCs, recommends that ‘3-dimensional shapes in DPC should be pre-fabricated’ avoiding site fabrication.
The A. Proctor Group Ltd recommends the use of preformed corner units to achieve gas tight seal.
Preformed corner units are a technically better solution for gas proofing and are also cost effective, due to the added time it takes to create similar details in situ.

